Adding a page to the top menu
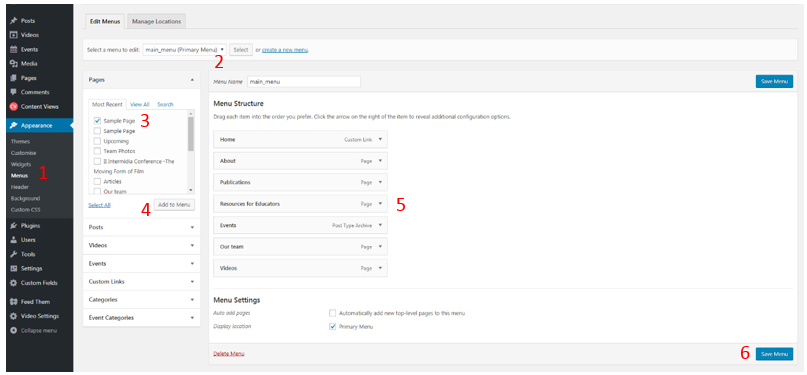
The menus are manually built (for the following numbers, refer to the picture below):
- Go to /Appearance/Menus.
- Edit the main menu or any menu that is defined as the “Primary Menu”.
- Select in the left part the page / post you want to add to the menu.
- Click “Add to Menu”.
- Drag and drop the new menu item at the correct location in your menu.
- Save the Menu.
Note: In a menu, you can also add a link to any type of document or URL: external page (custom link), a link to some of your blog posts (also sorted by category or tag), links to events…
Adding a document (pdf, MS-office)
The documents are considered as Media. So you can add them the same way as you would add a picture or movie: https://easywpguide.com/wordpress-manual/adding-images-other-media/
This will create a hyperlink of your text to the file.
Use accordions
Activate the plugin “Accordion Shortcodes”
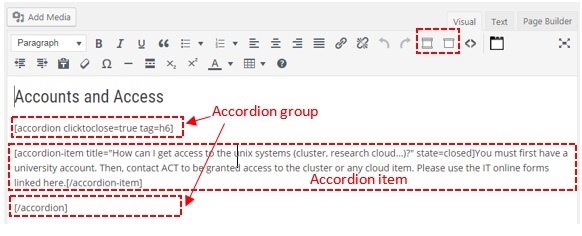
You should now have 2 added icons on your test editor (see picture). One is to create the accordion group, the second is to add an accordion item.
The icons will create shortcodes (read more on shortcodes in dedicated section) that you can populate.
Use tabs
You can structure your page by splitting the content into tabs.
You’ll need to activate 2 plugins:
- Tabby Responsive Tabs : will create shortcodes for the tabs.
- TinyMCE tabs: will add an icon to insert tabs shortcodes in the text editor.

Use internal anchors
You can link some text to internal anchors:
- Create an anchor by selecting the text to link to and clicking on the anchor icon in the editor
 . Give a name to this anchor: e.g. “anchor1”.
- Select the text you want to link to this anchor and click on the link button (chain icon). Type “#nameofyouranchor”. e.g. “#anchor1”.
Insert a slider (of pictures, posts, videos...)
Activate the plugin Smart Slider. Read more on the plugin website…
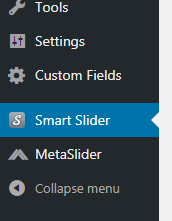
Now you have a dedicated menu in the left panel of the dashboard. You can create picture/video carousels and insert them in your pages by pasting the associated shortcode.
Create a new slider, and add slides: default is a picture, but you can choose other types of slides, see below:
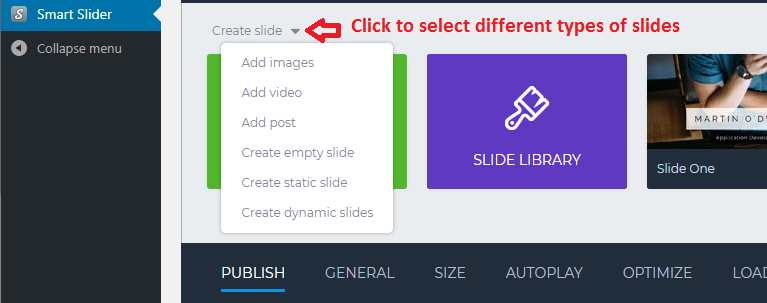
After saving, you can get the shortcode. This shortcode can be put anywhere in your page, post, widget… and will display the slider instead.

Advanced page structure: 'Block' editor or 'siteorigin page editor'
Update May 2019: Since WordPress 5, there is a new “block” editor that can be activated for your site. Read more on the block editor... If you want to use this editor, please request IT.
Old fashion way:
Most of the above presentation improvements can be done by using an advanced page editor called “siteorigin Page Editor”.
With the page editor, you can:
- Structure your page in columns and rows. This is all responsive and works on small screens too.
- Include all WordPress widgets in your page, plus all the siteorigin widgets, such as Post carousel, google maps, slider…
Activate the 3 related plugins:
- Page builder by Siteorigin
- Siteorigin Widgets Bundle
- Tab Widget for Siteorigin
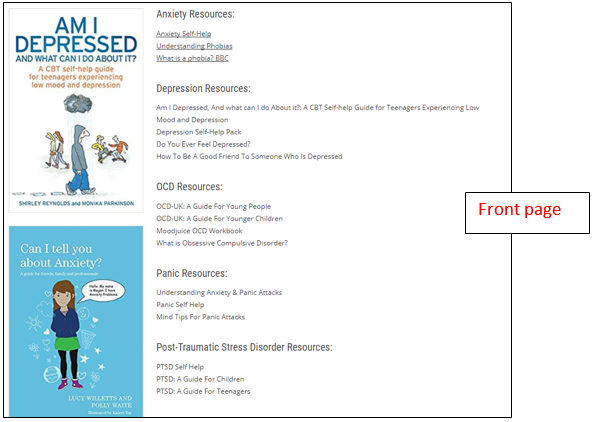
Example of a page structured by Siteorigin page builder:
Quick introduction to the siteorigin editor (bullet numbers refer to the pictures):

- Select the Page Builder option in the page editor.
- Add the rows you need. In the row editor, you can select the number of columns.
- Add widgets into your row cells. A widget can be a picture, some text or any usual WordPress widget (see widget section below).
- Edit your widget.
- Save your page in the same way as any other page.

Posts: best use of 'categories' and 'tags'
Categories and Tags can be used to sort and filter your posts. Categories are usually the main types of posts (e.g. news, publications, events…). Tags can be cross-categories and used to highlight the content (e.g. staff, collaboration, lab, experiment…)
In the Reading Research theme, tags are used as filtering options when displaying a list of posts:
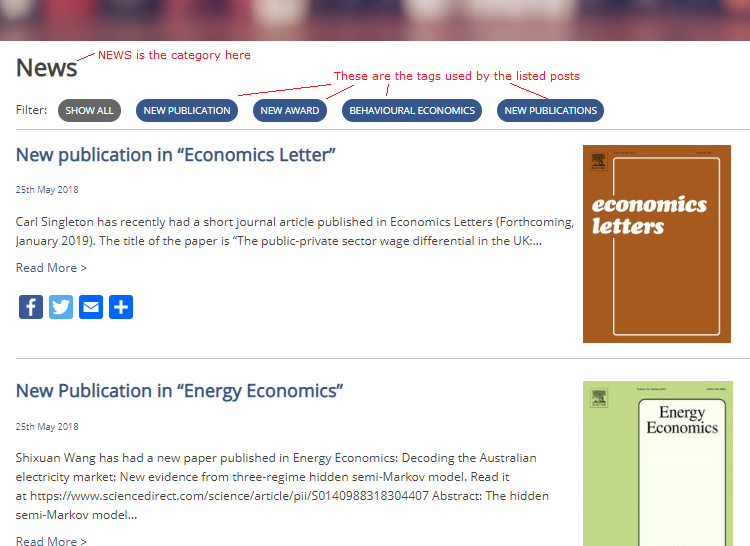
List posts items
Each post displayed as a single line
- Use the default widget “Recent Posts” in the widget management area.
Example:
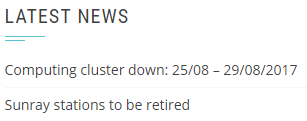
As a widget, this is only displayed in a widget area (e.g. sidebar).
2. To display the posts in a page, use the plugin “Display Posts Shortcode” and add the shortcode you want to the page content. A shortcode example could be: [display-posts posts_per_page="5" image_size="thumbnail"] Read more on the shortcodes to display posts…
Nice looking posts list (with excerpt, author, date, picture…)
Use a plugin, such as “Content Views”.
Example of posts presentation, with 2 columns:
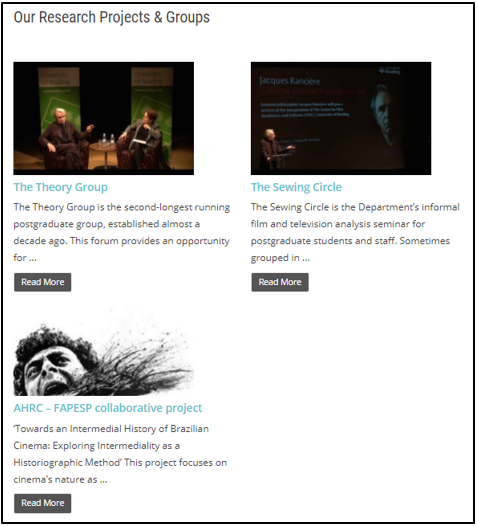
Same page, on the editor side (see the shortcode to call the Content View):

The Content View has been setup in the dedicated menu, available on the left:

Alternatively, you could make a slider of posts. You can use the Smart Slider plugin to create a slider of posts. Read more on the plugin website…
Include nice tables with sort and filter options
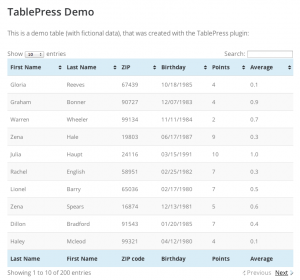
Use the TablePress plugin to create nice looking tables, with sorting and filter. The table has to be created within the plugin menu on the left, then include the generated shortcode into your text.
Read more on the plugin site…
Include Maths Equations
You can use an advanced Math Equation Editor by activating the dedicated plugin called: “Equation Editor” (Go to “Plugins menu”, for admin only).
This equation editor allows to write equations with Latex code too.
Include Code (Python, Fortran, C++...)
- You can use the <code> icon in the page editor
 . If this icon isn’t available, activate the “TinyMCE Advanced” plugin, then go to Settings / TinyMCE Advanced and add the code button to the editor.
- You can also do the same by yourself: write your code between the html tags <code> </code> in the “text” editor mode.
- Finally, you can use an advanced tool to display codes by activating the Crayon Syntax Highlighter plugin.
 WordPress advanced edition page / post


