
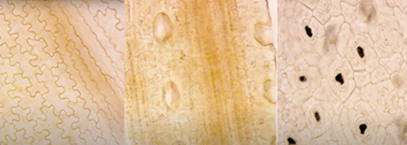
Figure 1. Prepared leaf cuticle samples from left to right: pine, fern and broadleaf sample
If you have ever wondered how to prepare your leaf cuticles for analysis, like in the figure above, then look no further.
LEMONTREE PhD candidate, Astrid Odé, gives a step-by-step guide of how it is done in this blog, or you can check out the video on YouTube for her demonstration.
The cuticle is the outer layer of the leaf. It is made of a biopolymers that are impregnated with waxes that are made by the epidermal cells. The cuticle performs many important functions; it prevents the plant from drying out, it acts as a protection layer against pathogens and it controls the gas exchange across the leaf.
Aside from creating pretty images like above, examining the leaf cuticle under a microscope can provide us a wealth of information. Due to the imprint of the epidermal cells and stomata, the cuticle can provide us with a lot of information about the plant and the environment it has grown it. You can tell the species of plant based on the epidermal cells with angiosperms, gymnosperms and ferns have very different shapes. The frequency and distribution of stomata can help us understand CO2 concentrations, light and temperature conditions and information about the growing season.
So, when we dig up very old plants and their cuticles, we get to look in the past at the environment at the time and we can use this evidence to recreate historic growth conditions and produce more detailed and accurate climate models.
Obtaining a nice cuticle sample is not always easy but following Astrid’s step-by-step guide below should help you create clean and clear samples.
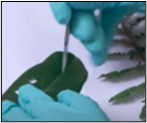
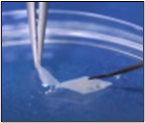
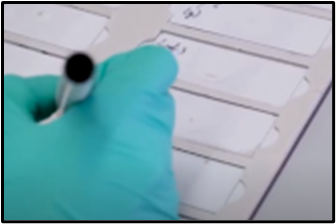
Step 1. Cut: Once you’ve collected the leaves that you have selected for your research purposes, take it to the lab and cut off a very small sample. If the leaf is already very small, make sure to cut off the edges because the cuticle is very resistant.
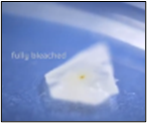 Step 2. Bleach: Place your leaf cutting into a test tube and add bleach. Leave this for 12-24 hours to separate the mesophyll cells. The timing depends on the leaf thickness, so it’s a bit trial and error. Once it is ready, your sample will turn white and see-through.
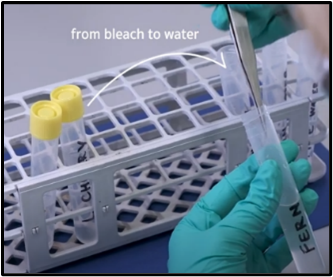 Step 3. Rinse: Then you rinse it with water to get the bleach out again.
 Step 4. Separate: Put the sample on a plate and using tweezers, gently separate the upper side and the lower side of the leaf. You need the side where the stomata are. This is the tricky part and can take some practice.
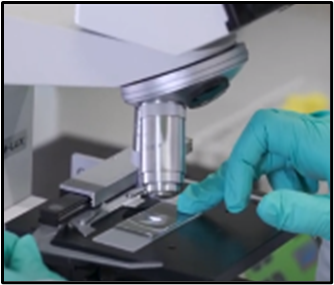 Step 5. Check: To check you have the right side of the leaf, put the sample of a glass slide, place on the cover and check it under the microscope.
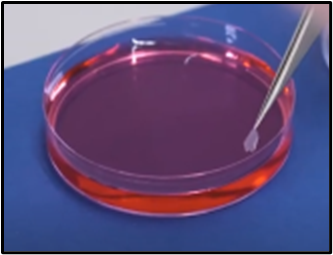 Step 6. Stain: Once you have checked you have the correct side of the leaf, take the sample off the glass slide and add a stain, such as safranin, which is pink-red in colouration. This will increase the contrast, so you get a better view of the stomata and the epidermal cell boundaries.
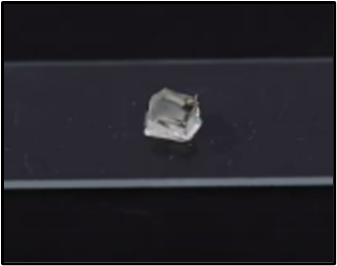 Step 7. Fixate: Place the sample back on the glass slide and pop a tiny cube of glycerine on top of the leaf sample. Put the slide on top of a hot plate and melt the glycerine so that the fully covers the sample. Add a glass cover on top and once cooled, check it again under the microscope.
 Step 8. Label: Your slide is finished.
So, there you have it, a nice easy to follow guide to on how to produce good quality leaf cuticle samples for microscope analysis. Thanks, Astrid!
Astrid Odé is a PhD student at the Copernicus Institute of Sustainable Development, Utrecht University. Astrid is supervised by Associate Prof. Karin Rebel and Assistant Prof. Hugo Jan de Boer. Her research is focussed on plant ecophysiology and she has experience in palaeoecology, including cuticle analysis, proxy development and reconstructing growing season dynamics.
Photo credit: stills from film by Juul van der Laan https://www.juulvanderlaan.nl/
Natalie Sanders is Data and Communications Manager at Imperial University.