Connecting to nx.reading.ac.uk via NoMachine
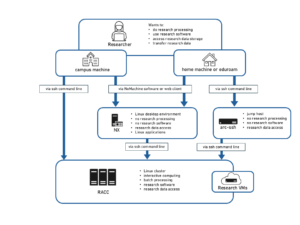
NX provides a Managed Virtual Linux Desktop on and off campus. All university staff and students automatically have access to this service on campus, using their university credentials (username and password). Off-campus access needs to be requested though the DTS Self Service Portal.
The following article is a step-by-step user guide on how to access nx.reading.ac.uk using the NoMachine Web Client (Section 1) and the NoMachine Enterprise Client software (Section 2). See our article on how to access the NoMachine software for information on how to obtain the software.
1. Connecting via the NoMachine Web Client
In order to use the NoMachine Web Client, a request for access needs to be placed though the DTS Self Service Portal. Once access has been granted, simply open https://nx.reading.ac.uk:4443 in any web browser. The NoMachine web interface has a very similar functionality to the software as well as a similar look (see screenshot below).
The web client does not have all the features of the full software client (e.g. mapping drives does not work) but you can still drag and drop files on to the NX desktop, connect to the RACC via the MATE Terminal or use the NX file transfer.
2. Connecting via the NoMachine Enterprise Client Software
If you have the NoMachine enterprise client installed on your local machine (or if you are using it through AppsAnywhere), you can also use it to connect to nx.reading.ac.uk from off-campus. The connection process is the same as on-campus, simply follow the instructions below.
First-time Connection
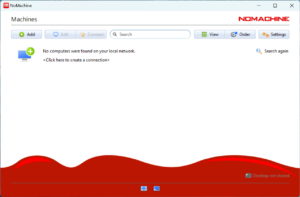
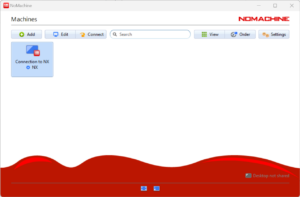
- Open the NoMachine software. You’ll see a startup screen similar to the image below:
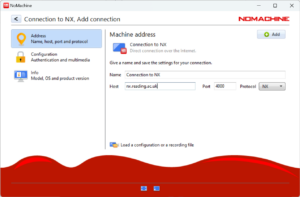
- Click on the ‘+ Add’ button to start setting up your new connection. On the next screen, enter your chosen name for your connection and ‘nx.reading.ac.uk’ as the ‘Host’ as in the image below. Leave all other settings as they are by default, then click on the ‘+ Add’ button on the top right to confirm.
- On the next screen, you’ll now see a new icon with the name that you gave your connection, like in the image below. Double click this to start connecting. You can also right- or control-click the icon and select ‘Start connection’ from the pop-up menu.
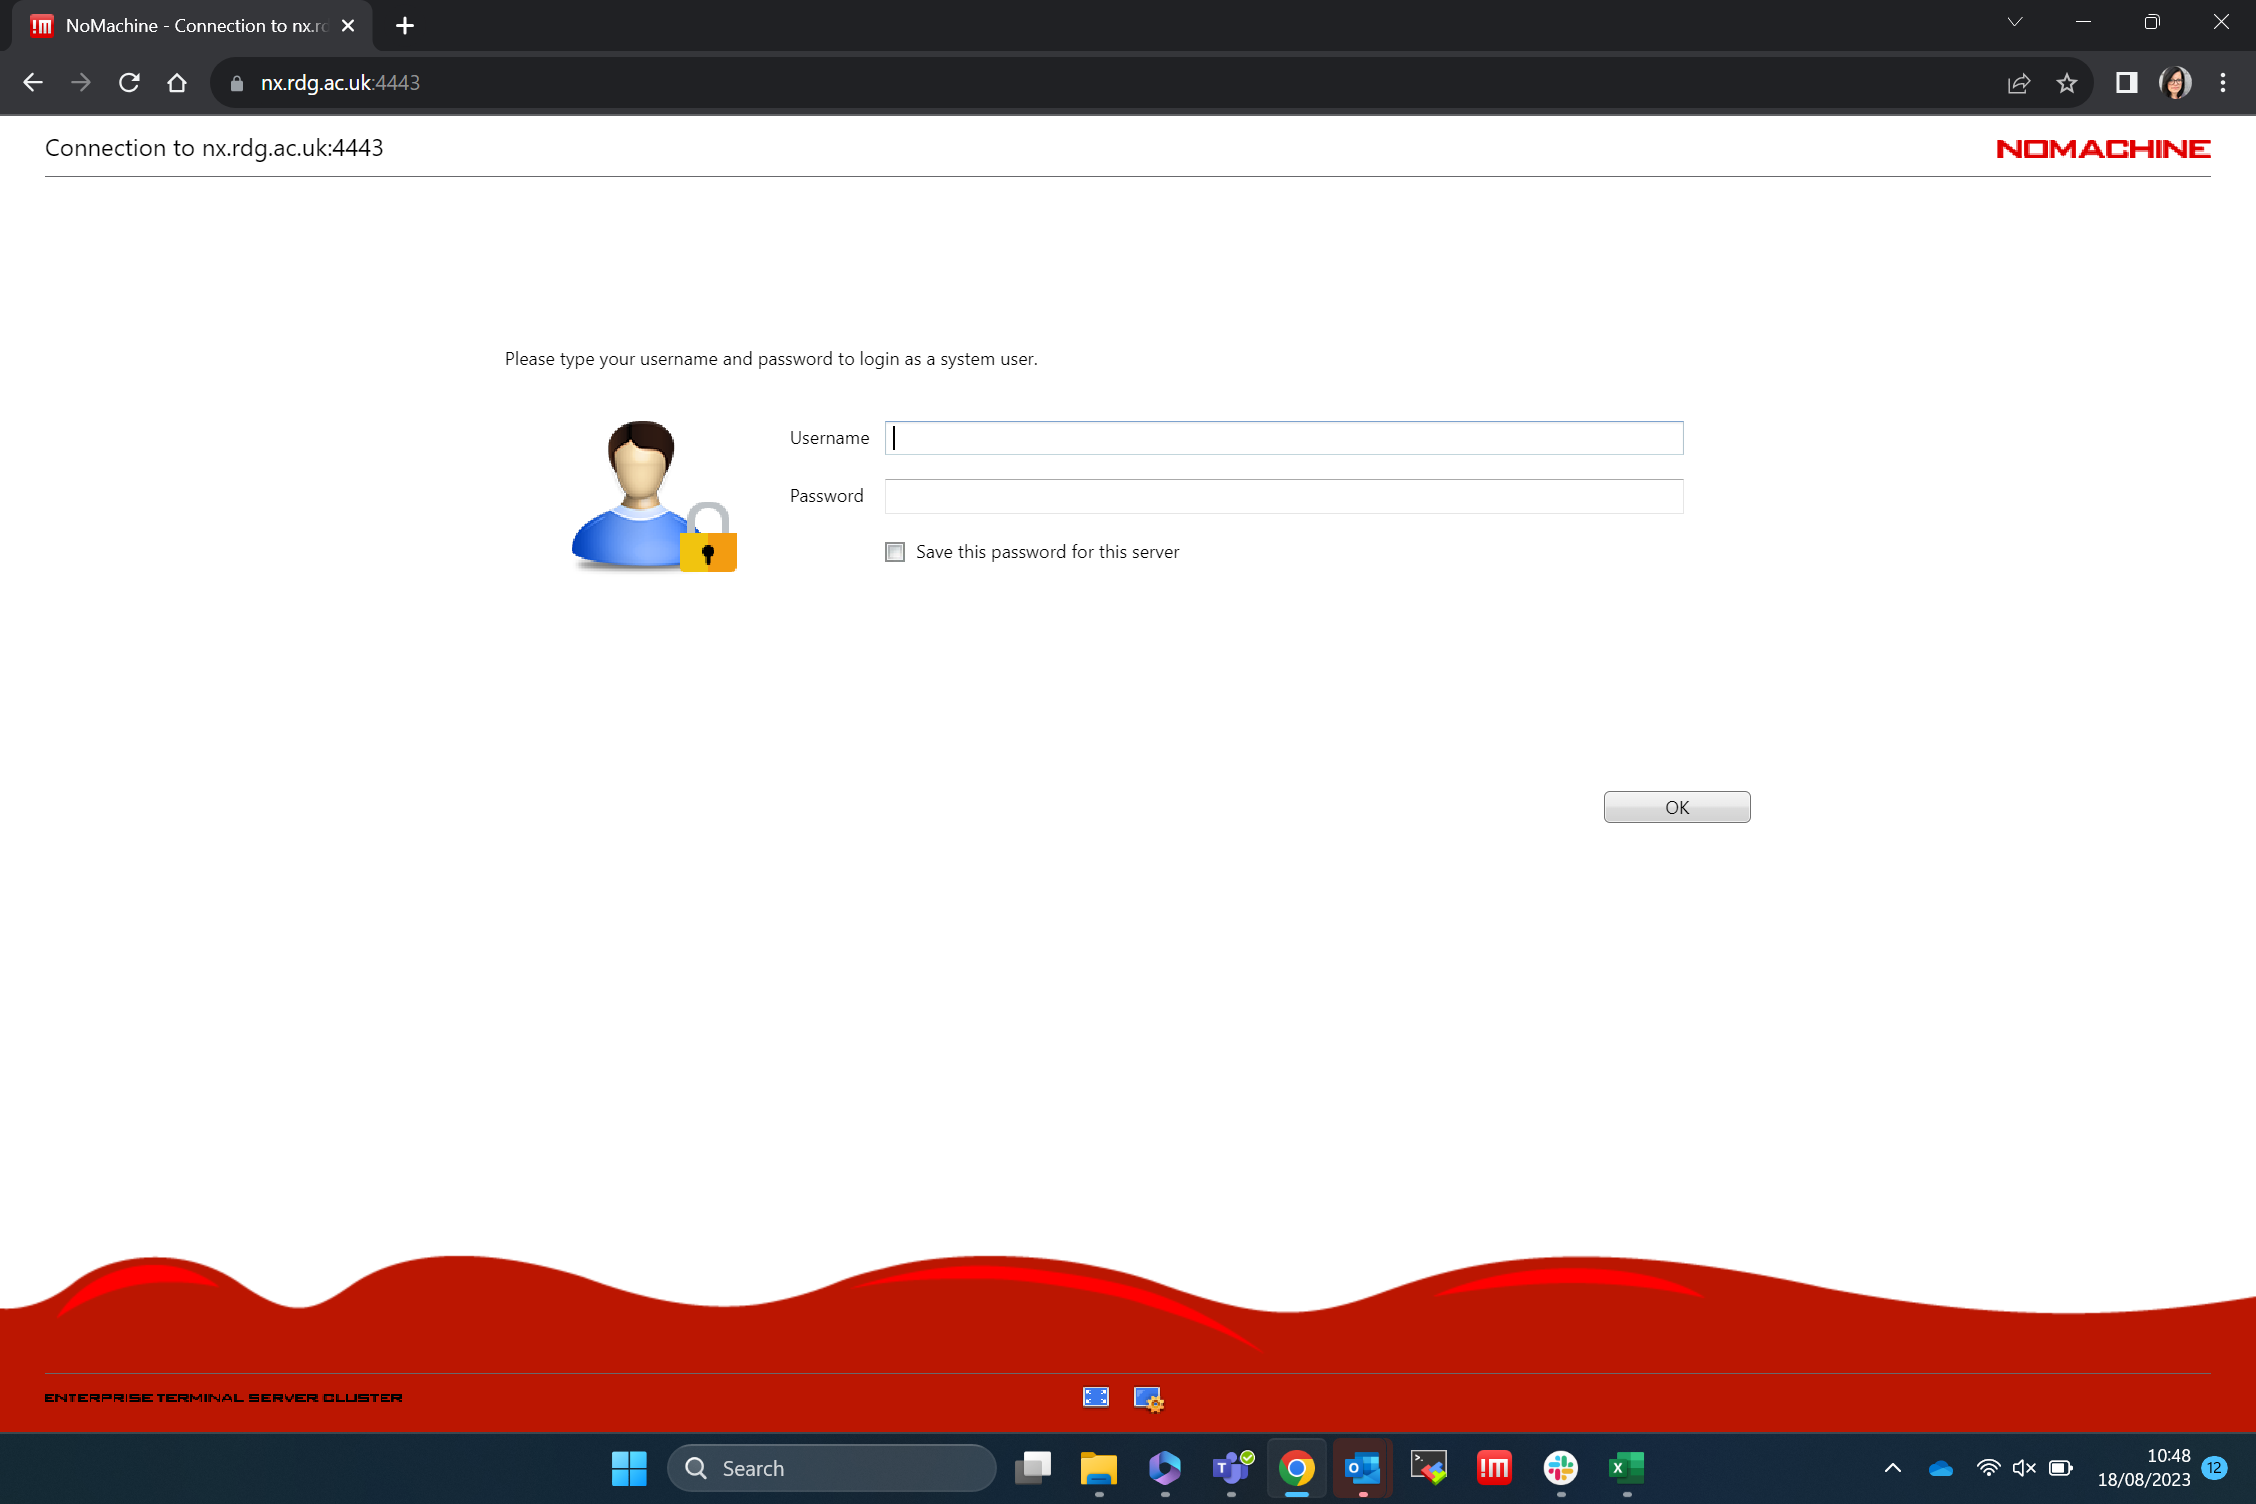
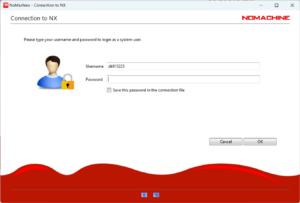
- Next, you’ll encounter the login screen, such as seen below. Enter your username (without adding @reading.ac.uk to it) and your password and click ‘OK’.
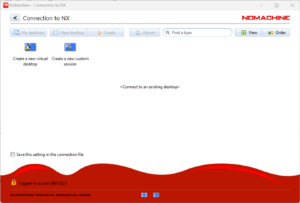
- Once a connection is successfully established, the next screen gives you two options: one to create a new virtual desktop (which is the standard option) and one to create a new custom session (for more experienced users). Sessions on nx.reading.ac.uk are persistent and can be reconnected to. Once you have an active session, you’ll see it on this screen instead of the two choices below. You can then simply reconnect to that by double-clicking the icon of your existing session. You can also terminate it, you’ll find more information on how to do it here. For a first-time or fresh connection, choose ‘Create a new virtual desktop’.
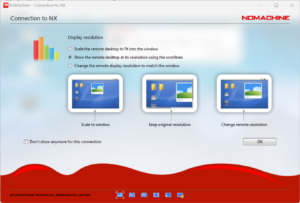
- When your session is successfully created, you should see a series of screens that concern your display settings, such as the one below. These settings are fully customisable and you can choose according to your preferences. You can also tick the box to not show these screens on your subsequent logins, as these settings can be changed at any time later on in the session. To find the display preferences, move your cursor to the top right corner near the red ‘power’ button, where you’ll see a page fold appear. Click this to enter the display preferences.
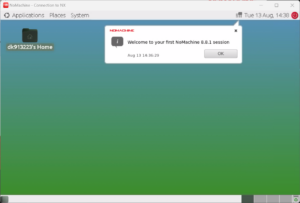
- Once you have finished the initial display setup, you should arrive at the Linux desktop screen, see the image below. From here, you can use MATE Terminal to log into the Reading Academic Computing Cluster (RACC2) and access files in your home directory files or research storage for example. Please note, that all data processing is to be carried out on the RACC2, nx.reading.ac.uk is only intended to be used for lightweight Linux tasks and data access.
- When you want to stop using nx.reading.ac.uk, you have 2 choices:
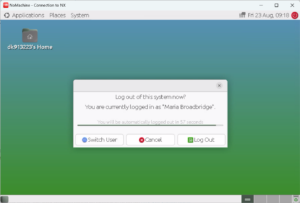
- You can either log out of the system by selecting ‘System’ in the menu bar and select ‘Log Out <username>’. This will pop up a window in which you can choose to log out of the system as shown below. Note that there is a 60 second timer that logs you out automatically if you don’t cancel. Logging out terminates your session, clearing your running applications and a new one will be created when you log in again.
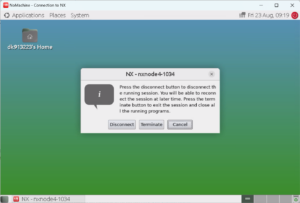
- You can also click on the ‘x’ button on the window. This will prompt a different pop up window, as below, which gives you the choice of terminating your session (same as logging out, your session will be cleared and a new one will be created on your subsequent login) or disconnecting from your session. Sessions are persistent on nx.reading.ac.uk so you can choose to disconnect from it and reconnect to it at a later time (from either the client software or the web client), with your running applications still open. Please make sure that you save your work before disconnecting in case the server hosting your session has to be rebooted.
If you run into any issues when trying to connect to nx.reading.ac.uk, have a look at our troubleshooting guide, which has some solutions to the most commonly encountered issues. Any other problems should be reported to us via the DTS Self Service Portal.
Nomachine official documentation